Saturday 5 December 2020

3 Lawn Fawn cards using Mojo Monday 2 Sheet Wonder

Hello Crafters!  Welcome back to a new blog post where today I share some cute Lawn Fawn Christmas cards made with the help of the Mojo Monday 2 sheet wonder challenge (original challenge is here Mojo Monday 533 - 535 - Poetic Artistry)

For my cards I used 2 sheets of paper from the Milk & Cookies Doodlebug Design paper pad (this one is old but you can use any papers you like) and I pulled out lots of scrap papers to help mat the layers which gives more depth and dimension.  I amended the measurements on the challenge sheet as Doodlebug papers are 6"x6" (and not 6" x 6.5").  See below for my amended measurements.


Here are the measurements for the matting layers A-D (they are all 1/8" larger)

A = 5 3/8" x 4 1/8" 

B/C = 3 1/8" x 2 1/8"

B/B (together for card #534) = 4 1/8" x 3 1/8"

D = 4 1/8" x 7/8"

Image panel dimensions:

Sketch 533
3 1/4" x 2 1/4" (matting panel 3 3/8" x 2 3/8"

Sketch 534
2" x 2" (matting panel 2 1/8" x 2 1/8")

Sketch 535
Circle 2 1/4" (matting circle 2 1/2")

Before making your first cut (please see the challenge sheet) have a look at the orientation of your pattern.  You want to make sure that you cut your paper so that you can use your papers in the orientation you want.

Once I cut both sheets in to pieces I played around with the papers according to the sketches and figured out how I wanted to arrange them.  I secured all the pieces to a matted layer using various scraps from my scrap box - this project is a great way to work through left over coloured paper scraps!

For the images on the front of the card I used Lawn Fawn Ho Ho Holidays and Holiday Helpers.  I coloured them with Copic Markers in the following colours:

Reds: R39, R37, R35

Pink: R85, R83, R81

Hair/Beard: W6, W4, W3, W1

Belt/Boots/Shoes: C10, C7, C5

Buckle: Y26

Trim/Apron: C3, C1, C00

Duck: Y15, Y13, Y11

Box: E77, E74, E71

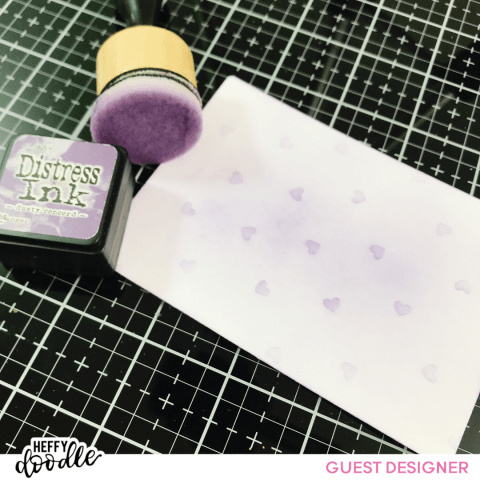
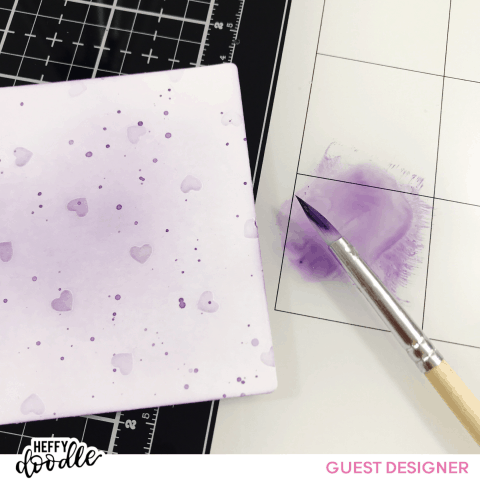
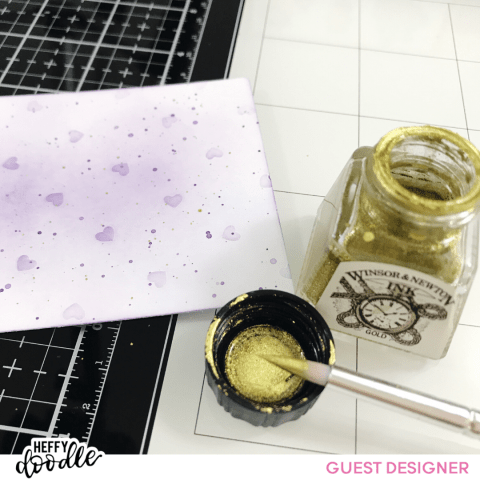
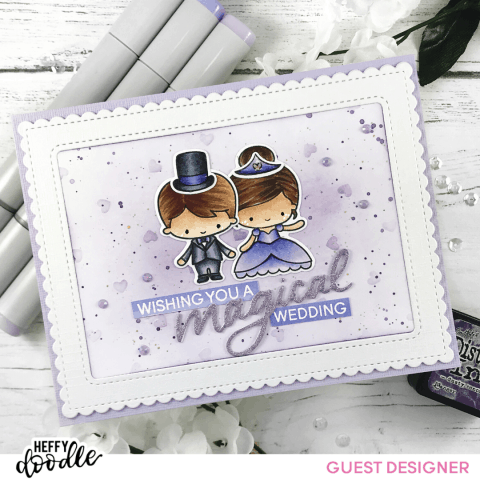
To give some dimension to the image panels on the cards I lightly used a blending brush to lightly apply some Distress Ink in Festive Berries.  I really like the pink/red tone of this ink and it paired well with the colours on the patterned paper and copic coloured images.  I secured my images with liquid adhesive and also added some red star confetti to add to the sparkle!  I covered the images in a light layer of Nuvo Aqua Shimmer Pen which gives a subtle shimmer as the cards move.

The sentiments were stamped in my mini Misti with Versafine Onyx Black Ink.  I used 'Merry Christmas' from Bitty Holiday Wishes by MFT.  For sketch #534 I adhered a 'Seasons Greetings' cut apart.

All of the card panels were secured to A2 sized heavy weight white card bases.

Check out the video below for a 'how-to' guide

I hope these cards inspire you to use pull out some of your patterned papers and create some fun and fairly quick and simple (Christmas) cards.  Once you have the measurements all sorted out you could easily create a lot of cards in a production line like style.

Hope to see you back here again soon! 
Elaine xx

Saturday 21 November 2020

Lawn Fawn Slimline Christmas Scene Card - Happy Holiday Critters

 Hey friends!  Today I'm sharing details of this super cute mouse filled slimline card for the which I created for Lawnfawnatics Challenge #89 'Happy Holiday Critters'.


I stamped and coloured lots of images from various sets of Lawn Fawn stamps (see below for a full list of supplies).  I coloured all the mice the same colours and many of the images are coloured with same pinks and reds (all listed in the graphic) to keep the colouring quick and keep the card looking cohesive throughout.  

For the background I used Distress Oxide inks in Spun Sugar and Picked Raspberry, focusing the intensity of the colour at the top of the card stock.  To deepen the shade further I brought in Distress Ink in Festive Berries.  I added some white dots with a gel pen to create more interest and give the look of wallpaper to the scene.

The idea of the card was to create a production line so I know my oven would go in the middle of the card.  I spent some time arranging the left side of the card to feature all the baking and mixing elements and on the right of the oven, I pulled together lots of images to create a feast for Santa!

I kept the sentiment simple, not least because I didn't have a great deal of room, but also wanted to keep the focus on the images.  The sentiment uses two stamps from 'A Creature Was Stirring' stamp set which were white heat embossed with my favourite white embossing powder (Ranger Fine Detail) on to black card stock and cut into thin strips.

My card panel measures 8 3/8" by 3 3/8" and was secured down to a white card base measuring 8 1/2" by 3 1/2".  

To embellish the card I added some sparkle with my Nuvo Aqua Shimmer Pen and some shine with Nuvo Crystal Glaze.

For a full video tutorial please view my YouTube video!

If you liked this card you might also be interested in this one too!

Here is the list of supplies I used to create this card (pssst....affiliate links are included.  I appreciate any purchase made through my links - it's at no extra cost to you but helps me out so much and enables me to keep bringing you the crafty goodness 💗)

Sprinkled with Joy – Lawn Fawn 
A Creature Was Stirring – Lawn Fawn 
Baked with Love – Lawn Fawn 
Ho Ho Holidays – Lawn Fawn 
Holiday Helpers – Lawn Fawn 
Dandy Day – Lawn Fawn 
Jet Black Ink – Lawn Fawn 
Distress Oxide Spun Sugar - https://amzn.to/3pJ8BrQ 
Distress Oxide Picked Raspberry - https://amzn.to/3pLxbbC 
Distress Ink Festive Berries - https://amzn.to/3kKifac 
White Gel Pen - https://amzn.to/2K1oIkd 
Black Glaze Pen – Gelly Roll - https://amzn.to/3lO2oZl 
Versafine Onyx Black Ink - https://amzn.to/38F7EL6 
Versamark Ink - https://amzn.to/3nDbo47 
Embossing Buddy - https://amzn.to/2UEX7Ya 
8” Guillotine – Tonic/ Tim Holtz - https://bit.ly/34VYLJD 
Mini Misti Stamping Tool – My Sweet Petunia - https://bit.ly/2ISjnv0 
Super Fine White Embossing Powder – Ranger - https://amzn.to/38YsYeX 
Aqua Shimmer Pen - https://amzn.to/3lQFzV5
Copic Markers
Red - R59, R39, R29 Pink - R85, R83, R81 
Mice – E44, E43, E42, E41, E40, R20, R00 
Greys – C7, C5, C3, C1, C00 
Dark Green – G99, G94, G21 
Gingerbread House - E35, E33, E31, E29, E27, E25 Y13, Y11, C1, C00
Gingerbread Mice - E27, E35, E33 
Pudding – E79, E77, E74, C3, C1, C00

If you are inspired by my card and create something be sure to tag me and show me!

I'll be back next week with a new project.  Elaine xx


Saturday 14 November 2020

Gnomey Winter Wonderland Slimline Card

 Hello and welcome back to my YouTube channel and blog!  Today I am sharing a slimline card featuring a winter wonderland full of cute gnomes using stamps and dies from Mama Elephant.


To start with I ink blended a piece of light blue coloured card and starting at the top ink blended on some Distress Ink in Peacock Feathers.  I focused the majority of the colour at the top.  To darken the sky a little more I used Distress Ink in Blueprint Sketch and finally used a dye ink in Navy from Hero Arts.  

To add the falling snow I dotted on white dots using a white paint pen by Jane Davenport (link down in the supplies section).  Sometimes I just can't be dealing with the splatter clear up :) and this method is so super quick!

I used the Slim Woodland die by Mama Elephant to help build the scene.  I cut two from heavyweight white.  I trimmed the bottom section to just leave the snow banks and ink blended on some Peacock Feathers.  For the trees I used Distress Inks in Antique Linen and Vintage Photo.  

For the gnomes I used Little Gnome Agenda stamps and used the candy house from Cookie Christmas and coloured these with my copic markers as follows:

To add more interest to the card I coloured some holly sprigs from Snow Friends stamp set and some gift packages taken from Page Huggers stamp set.  To ensure they co-ordinated I used the same colours of copic markers.

On the trees I added some chunky glitter, I can't make a card without adding sparkle at this time of year! 

I trimmed down my blue ink blended panel so that it fit behind the woodland die cut and then adhered the snow banks on top.  I made a card base from heavy weight white card (I have a stash of these pre made....the card base measures 8.5" x 3.5") and secured the scene panel to the card base.

For the sentiment I used Mama Elephant's Jingle Greetings stamp set and used Versafine Onyx Black Ink to stamp this on to the card front.

To finish up the card I applied some Nuvo Aqua Shimmer Pen on to various parts of images and also accented certain elements with Glossy Accents....I love the dimension this gives.  I added a small clay heart to the gnomes sign.

For a full 'how-to' tutorial check out the video below!  I'd love to know what you think :)


Supplies used:

Slim Woodland Creative Cuts - Mama Elephant
Little Gnome Agenda stamps - Mama Elephant
Cookie Christmas - Mama Elephant
Jingle Greetings stamps - Mama Elephant
Page Huggers stamps & dies - Mama Elephant
Snow Friends stamps & dies - Mama Elephant
Distress Ink:
Peacock Feathers - https://bit.ly/36zomca
Blueprint Sketch - https://bit.ly/2UqcymQ
Antique Linen - https://bit.ly/2Um8ZxZ
Vintage Photo - https://bit.ly/35sreIt
Pool - Navy Ombre Ink Pad - Hero Arts
White Paint Pen - Jane Davenport https://bit.ly/2Iyf7RB
White Gel Pen - https://amzn.to/2K1oIkd
Versafine Onyx Black Ink - https://amzn.to/38F7EL6
Copic Markers (see colour map)
Aqua Shimmer Pen - Nuvo - https://bit.ly/2UocEvp
Glossy Accents - Ranger - https://bit.ly/3py1qD5 & https://amzn.to/3lv1DnN
300gsm Premium White Card Stock - Hobby Craft

 ***

Thank you for joining me here on my blog!  I look forward to seeing you back here again soon for some more wintery themed cards!

***

Affiliate links are contained in the post.  This means should you purchase something through one of my links I will receive a small commission at no extra cost to you.  I appreciate every purchase made and am truly grateful for your support xx


Sunday 27 September 2020

Fox Costumes Before 'n Afters - Halloween Card #6

I'm back with another card for Halloween!  Couldn't wait to used my new Lawn Fawn Fox Costumes stamps and make a fun fall themed card.
I started by finding an inspiration photo on Pinterest then picked out some Distress Ink and Oxide colours that I thought matched quite well.
I cut a scalloped slim panel from Strathmore Bristol Smooth card stock using Scalloped Slimline Die from Time for Tea Designs.  Using an assortment of Distress Inks I ink blended the panel.  The colours I used were Distress Ink in Dried Marigold, Spiced Marmalade, Stormy Sky, Faded Jeans & Black Soot.  I also used a little Weathered Wood Distress Oxide to blend from orange to blue.  To add some distressing to the panel I splattered on some rose gold metallic paint and some black paint.  I set the aside to dry.
https://amzn.to/3lTzy9y
I stamped and cut the foxes and coloured them in with alcohol markers.  A list of the main colours used can be found in the colour map pictures below
The grass banks the foxes are each standing on were made from black Sparkle card from the Autumn sparkle card pack.  I cut a long strip, 1/2" wide and then ran the strip through the die cutting machine with a grass border die from the Landscape Borders die set by Time for Tea designs.  I cut the strips in to 2" lengths.  The strips were adhered with liquid adhesive at alternate intervals down the card.
To give the strips the scalloped edges I ran the whole panel back through the die cutting machine with the same scallop slimline die.  
The scallop panel was adhered to a white heavy weight card panel measuring 8 3/16" x 3 3/16" then the white panel adhered to a black slimline card base.  The card base measured 8 1/4" by 7" scored at 3 1/2" to create a card front measuring 8 1/4" 3 1/2".
Scotch 3M foam tape was secured to the back of all the foxes and adhered to the card on the sparkly grass banks.  The accessory images (some from Fox Costumes and some from Spooky Village stamp set) were applied using liquid adhesive.
For the sentiment I stamped 'Trick or Treat' on to treated black card stock with Versamark Ink, coated the inked piece with Ranger Super Fine White Embossing Powder and heat set with my heat tool.  I cut the words out using my Tim Holtz Guillotine Trimmer, popped double sided adhesive on the back of each piece and secured them to the card.  A T-square ruler helped to get the strips straight.
To finish off the card I added some 'BOO' and 'EEEK' all over the background with Versafind Onyx Black Ink and a few bats from Spooky Village stamp set.  I applied some Nuvo Aqua Shimmer pen on various elements of the copic coloured images for some subtle sparkle.  Lastly I added a few small dots of glue and adhered some small gold star confetti.
I really hope you enjoyed this card, I really had fun making it!  Check a out the YouTube video below for a full how-to tutorial.

Supplies used:
Fox Costumes Before 'n Afters – Lawn Fawn
Spooky Village – Lawn Fawn
Scalloped Slimline Die – Time For Tea Designs **
Landscape Border Dies – Time for Tea Designs **
Strathmore Bristol Smooth Card
Distress Inks
- Dried Marigold
- Spiced Pumpkin
-  Stormy Sky
-  Faded Jeans
- Black Soot
Distress Oxide
- Weathered Wood
Classic Metallic Paints – Komorebi Watercolor Paints
https://amzn.to/3lTzy9y
Black Paint – Gansai Tambi Watercolor 36 pan
Black Sparkle card stock (Autumn) – Lawn Fawn
Copic Markers/Script markers
- Foxes - E99, YR24, E97, E33/E33, E31, E30
- Stripes/accessories - BG9, BG7, BG3, BG1 (Script)
- Yellow stripe/chicks - Y17, Y15, Y13, C3
-  Cake Frosting - RV66, RV66/B66,  B63
- Pumpkins - E09, YR27, YR24
-  Candy corns. Y07, Y04, Y02/Y17, Y13
Iridescent White Glitter – Glamour Dust
2 Way Glue Pen – Kuratake
Versamark Ink
Versafine Ink (Onyx Black)
Superfine White Embossing Powder – Ranger
Embossing Buddy – EK Success
Heat Tool
8” Guillotine – Tonic/ Tim Holtz
Liquid Adhesive - Tombo
Gold Star Confetti

Look forward to seeing you back here again soon for card #7 in the Halloween series!
Elaine xx

* some of the products used on this card were gifted (as part of work on other design team work).  I am not obliged to use these products on non-design team work, I do so because I love them :)

some links in the description list are affiliate links.  I appreciate and am grateful for any purchases made through my blog and supplies list!#

xxx

Tuesday 22 September 2020

Spooky Wishes Halloween Slimline Card

Hello everyone!  Today I'm back with card number 5 in my Halloween card series for 2020!  I hope you like it, I've really loved seeing other crafters' green Halloween cards so I'm having a go at creating my own!  In this card I used Distress Inks in Twisted Citron, Peeled Paint and Black Soot.  I concentrated the darkest colours around the edge of the card and on top of the grassy borders
I used the Slim Window Dressing Creative Cuts from Mama Elephant for the base of the card.  I cut the panel 3 times.  I kept 1 panel whole and then used the grassy border dies in the set to cut the two more grassy banks.  This will help give the card some dimension and more spaces to add in my mummies!

For the Mummies I used the Little Mummy Agenda stamps set and stamped them on to Strathmore Bristol Smooth card stock.  The mummies were stamped with Versafine Onyx Black Ink. 
I coloured the mummies in with Zig Clean Color Real Brush Markers.  I used the darkest shades in the areas I wanted to create shadow and then pulled the colour out with lighter colors.  Here are the colours I used:
To created the large letter sentiment on the card I used the Whimsy Alphas.  I cut them out on the largest panel and again from some black cardstock.  I attached the largest panel to a 3.5"x8.5" black cardbase and then adhered the other grassy panels on top.  The black letter die cuts were glued in to the negative letter spaces and the green letters were adhered on the corresponding letter but was offset a little to help make them pop.  To add more dimension I covered all the letters in Glossy Accents.
To add to the sentiment I heat embossed in white embossing powder the word 'wishes' from the Sincerely Yours stamp set on to black card.  I trimmed this down and adhered it to the middle of the die cut letters.

Once the mummies were stuck to the front of the card I popped on some pretty Peacock Feather jewels and stamped the spider few times around the card using Versafine Onyx Black Ink.
If you would like a start to finish tutorial of this card then please see the YouTube video I created below:


Here is a list of all the supplies used in this card:
Little Mummy Agenda - Mama Elephant
Slim Window Dressing Creative Cuts - Mama Elephant
Whimsy Alphas Creative Cuts - Mama Elephant
Sincerely Yours - Mama Elephant
Distress Ink - Twisted Citron, Peeled Paint, Black Soot
Black Paint - Gansai Tambi Watercolor 36 pan
Versafine Onyx Black Ink
Versamark Ink
Strathmore Bristol Smooth Card
Black Card - Creative Expressions 220gsm
Zig Clean Color Real Brush Markers
Super Fine White Embossing Powder - Ranger
Misti Stamping Tool
Embossing Buddy
Heat Tool


Thank you so much for joining me!  Come back soon for card number 6!


Monday 14 September 2020

Mama Elephant 8th Anniversary Release! Toasty Friends

 Hello wonderful crafty friends!  I'm so excited to share these projects for Mama Elephants 8th Anniversary release!!  Mama Elephant kindly sent me some goodies to play with and create some projects for you to get you all excited and inspired for all the newness coming on 15th September (release is available at 12am EST)!

My first project(s) are a card and tag using Toasty Friends(*) stamp set.  


How cute are these little critters huddled up around the fire with hot chocolate and marshmallows?!  I can't cope with the cuteness and those heart thought bubbles?  I just had to put as many as I could on the card!  

The soft ink blending on the background was achieved by using Strathmore Bristol Smooth card stock (so easy and soft to blend on) along with Distress Oxides in Victorian Velvet and Weathered Wood with some soft blending brushes.  To add extra interest I splattered on some gold paint from my 36 pan Gansai Tambi watercolour pallet.

The images were stamped on copic friendly card with Memento Tuxedo Black Ink.  The images were colored in Copic Markers.  I used a lot of colours and I have listed them all on this colour map:

The A2 card base is made from Simon Says Stamp 'Fog' card stock.  I trimmed the scene card panel to 5" by 3 3/4"" so that I had a nice 1/4" border around the edge,  This helped to frame my scene.

For the tag I used Mama Elephant Framed Tags Madison Avenue Creative Cuts with a left over piece of Bristol Smooth card stock.  I used the bunny and heart thought bubbles again from the Toasty Friends(*) stamp set.  I also used a sentiment from the new Mixed Holiday Greetings(*)  stamp set.  To finish the tag off I added a small piece of silver thread and a crisp white satin bow.  


If you would like to see a more in-depth video of the making of these projects be sure to check out the video below:
Here is a list of the rest of all the products used:
- Toasty Friends stamps & dies - Mama Elephant (*) 
- Mixed Holiday Greetings - Mama Elephant (*) 
- Framed Tags Madison Avenue CC - Mama Elephant 
- Strathmore Bristol Smooth Cardstock 
- Fog cardstock - Simon Says Stamp 
- Distress Oxide - Victorian Velvet 
- Distress Oxide - Weathered Wood 
- Gold Paint - Gansai Tambi 36 pan watercolour set 
- Memento Ink - Tuxedo Black 
- Versafine Onyx Black Ink 
- Copic Cardstock - Make it Blend (Marker Geek) 
- Copic Markers 
* Fireplace - E79, E77, E74, E71, E70, E19, YR27, YR24, Y15 Y11, E13, W8, W6, W4, W3, E29, E27, E23 
* Dog - E27, E25, E23, R20, C3, C1, C00 
* Bunny - E44, E43. E42, E41, RV52, R89, R85, R83 
* Lamb - W4, W1, W0, E44, E43, E42, R20 
* Thought Bubbles - C3, C1, C00, R89, R83, R83 
* Stockings & Rug - C3, C1, C00, R89, R85, R83, YG67 YG63, YG61 
- Foam Tape - Scotch 3M 
- Liquid Adhesive - Scotch Quick Dry
The Mama Elephant release will be available to purchase on 15th September at 12am EST.

Elaine xxx

Disclaimer:  Some items in  this blog post have been gifted for design team purposes.  Items which have been gifted are identified with an (*).  All other items in the creation of these projects was purchased by me.


Tuesday 1 September 2020

Interactive Pop Up Box Card for Halloween featuring Hello Bluebird stamps

 Hello crafty friends!  I'm back today with another interactive card for Halloween!

For this card I cut out all the pieces for the card using black cardstock with the Lawn Fawn Scalloped Box Pop Up die.  I cut 2 of the large panels which creates the box shape when adhered together with the flaps and 3 struts.  This card is fairly simple so I only needed 3 struts to create the scene.

For the grassy elements which adhere directly to the struts I used Lawn Fawn Sparkle Cardstock in black from the 'Autumn' pack.  I used a Mama Elephant grassy border die (I used one of the dies in the new Slim Window Dressing die set).  These grassy sparkly panels measured just ever so slightly shorter than 3.25" so that they fit nicely inside the box.  The box won't fold up nicely if the grassy panels are cut to exactly the same length as the struts.

For the panels around the edge (on the inside of the card) I used the dies in the Scalloped Box Pop Up die set to cut the rectangles from Bristol Smooth cardstock.  I inked on some clouds in Wilted Violet Distress Ink with the Mini Cloud stencil from My Favorite Things.  I splattered on some black paint splatters to add to the spookiness of the card.

My images were taken from the Spooky Spellers stamp set by Hello Bluebird.  The images were stamped on to copic friendly cardstock using Memento Tuxedo Black ink.  I used my copic markers to colour the images and a colour map is included here:


For the bat I added a small strip of acetate to the back to help him look like he was flying inside the card.  I used 1/8" double sided adhesive to help me get in less of a mess for this step.

I glued down all the cloudy panels to the inside flaps, adhered all the sparkly grassy borders and secured the bat (trimming off any excess acetate).  

For the sentiment I heat embossed in gold a 'Happy Halloween' sentiment from the Spooktacular Friends stamps set by My Favorite Things on to a scrap of black cardstock.  I trimmed it in to a thin strip and placed this on the front flap with double sided adhesive.

On the outside of the card I used some patterned paper from Spooky Boo 6x6 paper pad from Pebbles.  I love this dark grey design with black embossed bats.  I cut all the squares/rectangles needed and secured them with liquid adhesive ensuring an even border all the way around.  

For the very back of the card I placed a piece of white cardstock so that I have somewhere to write a message.  This measured 3 7/8" x 2 7/8".

Click below to watch the YouTube video:


Here is a list of the supplies used in this card:

Spooky Spellers stamps - Hello Bluebird
Spooky Spellers dies - Hello Bluebird
Scalloped Box Card Pop Up - Lawn Fawn
Spooktacular Friends stamps - MFT
Black Cardstock - Creative Expressions 220gsm
Sparkle Cardstock - Lawn Fawn (Autumn)
Grassy Border Die - Mama Elephant
8” Guillotine Trimmer - Tonic/Tim Holtz
Bristol Smooth Card - Strathmore
Mini Cloud stencil - MFT
Wilted Violet - Distress Ink
Black Paint Pan - Gansai Tambi Watercolour 36 set
¼” score tape (double sided adhesive)
1/4” score tape Strong Acetate (I used some old packaging)
Bone Folder - Lawn Fawn
Mini Misti Stamping Tool - My Sweet Petunia
Gold Embossing Powder - Papermania
Heat Tool - Papermania
Embossing Buddy - EK Success
Spooky Boo - Pebbles/American Crafts
Liquid Adhesive - Quick Dry Scotch Adhesive

I hope to see again soon with card #4 in my Halloween 2020 card series!

xoxo

Saturday 22 August 2020

Card 2 - Halloween Series 2020


 Hey crafty friends!

Today I'm very excited to finally be bringing you the second card in my Halloween series for 2020!  Today's card features some Hello Bluebird goodies:  Happy Haunters stamps and Boo To You die.  

I used the Sunny Studio Stamps Sliding Window die to create the interactive element and also went a bit extra and added a shaker panel.  

The front of the card was created using my Distress Oxides in Spun Sugar and Picked Raspberry.  I love a pink tone on tone cloudy sky!  I couldn't resist picking up the new Rolling Clouds stencil by My Favorite Things this month.  Love it!

I coloured the images with copics, a full colour map is featured below in case you want to know any of the colour combinations I used.

There are a lot of steps in this card but I think it is totally worth it.  I created a video (below) if you would like to see all the steps.  These photographs will help you to see what measurements I used if you want to create the same.

The smaller piece of card stock (as pictured below) sits behind the larger panel and is secured by using 1/4" score tape along the flap created at the bottom of the window flap.

Sliding window measurements (front panel & pull tab)

Shaker panel dimensions

For the shaker panel that sits behind the sliding window panel I cut this slightly smaller so that the pull tab can still be pinched and pulled.  A sentiment was stamped on the panel in the bottom third.  Small strips of foam tape were applied all around the edge and shaker pieces put in the well. Acetate cut to the same size as the card panel was adhered to the foam tape to securely house the shaker items.  

For the pull tab I used my crop a dile and an eyelet to create a tulle pull.  I added a small bow to hid the thread I used to tie the tulle.  


Supplies
Sliding Window die - Sunny Studio Stamps
Rolling Clouds stencil - My Favorite Things
Halloween Party - Hello Bluebird
Boo To You die - Hello Bluebird
Spun Sugar - Distress Oxide
Picked Raspberry - Distress Oxide
Picked Raspberry- Distress Ink
Black Soot - Distress Ink
Gansai Tambi Watercolor Set 36 - 20 Black
Copic Markers (see colour map)
1/8” double sided adhesive
1/4” double sided adhesive
Foam Tape - 3M scotch
Black Glaze Gelly Roll Pen - Sakura
Clear Sparkle Pen - Spectrum Noir
Glossy Accents
Crop-a-dile - We Are Memory Keepers
Eyelet - We Are Memory Keepers
Embossing Buddy - EK Success
Black Tulle - my stash
Sequins/confetti - my stash
Liquid Adhesive - Scotch
300gsm White Card
190gsm Black Card

Be sure to come back soon for card number 3!!

Tuesday 18 August 2020

Card 1 - Halloween Card Series 2020

 BOO - Pretty Pink Posh stamps & dies


Hello and welcome back!  I'm thrilled to be doing another Halloween card making series on my YouTube and blog this year!  My last was one back in 2018...its flown by!  I've linked to the playlist for 2018 down below...be sure to check it out!

For today's card I'm using the amazing BOO stamp set by Pretty Pink Posh.  I adore all the stamps in this style (LOVE, BABY & JOY) and I was excited I could finally get to use the BOO version.

Before stamping all the images on to copic friendly cardstock I planned out the background on a piece of white copy paper.  I wanted to make sure I was happy with the placement before inking on to my speciality card which is more expensive!
Once happy with my 'cheat sheet' I stamped all of the stand alone images in the set on to copic friendly card stock using my mini misti and my Memento Tuxedo Black ink.  I coloured the images with copic markers.  A colour map is provided below.  The panel was then trimmed to 4"x5.25".  

For the BOO letters I placed a piece of black card into my Misti, treated it with an anti-static powder tool and then inked up the stamp with Versafine ink.  I coated the card with clear embossing powder and then heat set until the images.  The letters were then cut out with the co-ordinating dies.

I cut another set of BOO letters and used liquid adhesive to secure them together to give extra dimension on the card. 

My card base measured 4.25"x5.5" and the coloured image panel was secured to it using liquid adhesive.  I used liquid to adhere the BOO letters ensuring they were straight with a T-square ruler.  

To pull the card together I added a bright orange sentiment by colouring a piece of white card stock orange using the same copic colours as the pumpkins on the background.  The sentiment was stamped in Versafine Onyx Black Ink and coated with clear embossing powder, then trimmed down to a small strip.  This was again secured with liquid adhesive.

For a full 'how to' tutorial, please see the video below:


Copic Colour Map

Full supplies list:

BOO stamps & co ordinating dies - Pretty Pink Posh
Copic Markers
Anti static powder tool
Mini misti stamp platform - My Sweet Petunia
Clear embossing powder
Heat tool
Tuxedo Black ink - Memento
Pumpkin ink cube - Taylored Expressions
Lilac - Memento
Onyx Black ink - Versafine
Black Card stock
Copic friendly card stock
Big Shot die cutting machine
Liquid adhesive
Tim Holtz guillotine trimmer

2018 Halloween Series - click here

Thank you so much for stopping by!  See you next time! x0x0


Sunday 9 August 2020

Mama Elephant Little Ghost Agenda Halloween Card

Hey crafters!  
Today I'm sharing (I've already shared on Instagram!) on my blog and YouTube channel this adorable Halloween card using the Little Ghost Agenda stamps by Mama Elephant.


For the main panel of the card I used a medium weight piece of raspberry cardstock and cut it slightly larger than an A2 size.  I used Distress Inks in Picked Raspberry, Seedless Preserves and Black Soot to build up colour around the edges of the cardstock to create a gradient from darker on the outside to lighter at the centre of the card.  
I added some black and white splatters to add interest and texture to the cardstock.  Once the panel was dry I used the Mama Elephant Star Grid Cover Plate on the ink blended card.
I raided my patterned paper stash and picked out a number of pretty papers which I thought matched my colour pallet and cut out some stars using the same Star Grid Cover Plate.


Before adhering my ink blended panel to a black A2 sized cardbase I trimmed down the edges along the stitched frame using my guillotine trimmer.  


The panel was adhered to the card base using liquid adhesive and the decorative patterned paper stars were also adhered.
I stamped the ghost images in Memento Tuxedo Black Ink and coloured them with the following markers:

Ghosts
B01, B00, BG0000, 0, RV10

Accessories
C10, C7, C5 (hat)
YR27, YR15, Y15, YR02, YG65, E15 (pumpkin)
RV19, RV17, RV13 (lollipop)
E44, E43, E57, E55, E53 (broomstick)
E44, E43, E57, E55, E53 (sweet)

I heat embossed the 'happy Halloween to you' stamp from Pretty Pink Posh 'BOO' stamp set on to black cardstock with white embossing powder.  I trimmed it with my guillotine and adhered it to the front of the card with double sided tape.  

The ghosts were adhered with liquid adhesive along with some ebony jewels scattered around too.


Click below to watch the YouTube video


Here are all the supplies used for this card:
Little Ghost Agenda stamps (Mama Elephant)
Star Grid Cover Plate die (Mama Elephant)
BOO stamps (Pretty Pink Posh)
Distress Inks: Picked Raspberry, Seedless Preserves, Black Soot
Copic Markers (colours listed above)
Copic Opaque White
Raspberry Cardstock
Copic friendly cardstock (Marker Geek)
Assortment of patterned papers
Black Cardstock (Creative Expressions)
Memento Tuxedo Black Ink
Super Fine White Embossing Powder (Ranger)
Liquid adhesive (Gina K Connect glue)
Guillotine (Tonic)
Ebony Jewels (Lucy's Little Things)
Clear Sparkle Pen (Spectrum Noir)

I hope you enjoyed this card!  I have lots more Halloween cards planned so stay tuned and be sure to follow me so you don't miss any projects :)
Have a good day and thank you for joining me! xxx

Disclaimer: all of the supplies used in the making of this card were purchased by myself.  

Thursday 6 August 2020

Lawn Fawn 'Fun with Food' Lawnfawnatics Challenge #80

Hey Crafters!  Today I'm sharing a super cute food and Christmas themed card tutorial which I have recreated from the Lawnfawnatics challenge #80.  I was super excited to be a featured Fawnatic and I really hope you like the tutorial and corresponding information.


I have owned the 'Sprinked with Joy' stamp and die set and the 'Milk & Cookies' set for a couple of years now and never made a card with them.  I just couldn't think up an idea or design that I loved.  Then I saw the 'Holiday Helpers' set and just knew they were the addition I needed to pull together a cute card.  The 'Baked with Love' set just finished this card off but I only used the mixer....I ran out of room 😂.  Next time I'll create a slimline version so I can fit more images on!


Supplies
- Sprinkled with Joy (Lawn Fawn)
- Milk & Cookies (Lawn Fawn)
- Baked with Love (Lawn Fawn)
- Holiday Helpers (Lawn Fawn)
- Quilted Background Cover Plate (Lawn Fawn)

- Copic Markers 
  ~ Pinks - R85, R83, R81
  ~ Cool Greys - C5, C3, C1, C00
  ~ Warm Greys - W3, W1, W0
  ~ Warm Browns - E44, E43, E42
  ~ Skin Tones - E13, E11, E00, E000, RV21
  ~ Browns (hair) - E79, E77, E74, E71 / E29, E27, E25, E23
  ~ Golds - YR24, Y38, Y15, Y11

- Distress Oxide
  ~ Spun Sugar
  ~ Picked Raspberry

- Distress Ink
  ~ Antique Linen
  ~ Vintage Photo 

- Copic Cardstock (Marker Geek)
- White Heavyweight cardstock (Hobby Craft)
- Woodgrain Cardstock 'White' (Lawn Fawn) 
- Jet Black Ink (Lawn Fawn)
- Brads (Woodware) shorturl.at/sMO68
- Crystal Glaze (Nuvo by Tonic)
- Embossing Buddy (
- Mini Misti (My Sweet Petunia)
- Guillotine Trimmer (Tonic)
- Big Shot Die Cutting Machine

Saturday 25 July 2020

Spooky Halloween! Slim Card Little Mummy Agenda Halloween Card

Welcome to a super fun and cute Halloween card tutorial!  I absolutely love making Halloween cards and think its a great chance to explore vibrant and colours.  For this card I used Mama Elephant Little Mummy Agenda stamps along with the slim card basics dies from Mama Elephant.  A full list of supplies can be found towards the end of the post.


I created lots of grassy layers for my cute Mummy's to stand in and I think it just looks adorable!  

The finished card measures 8.5" x 3.5", heres a diagram to help....


The distress inks I used for this card were:
Tumbled Glass
Peacock Feathers
Blueprint Sketch
Chipped Sapphire
Black Soot

Check out the video for a full tutorial on this card...there were quite a few steps but I think it was worth it!


Supplies List

Mama Elephant Little Mummy Agenda Stamps
Mama Elephant Slim Card Basics
Mama Elephant Galactic Cover Plate Die
Lawn Fawn Grassy Border Die
Pretty Pink Posh Boo Stamp

Distress Inks:
Tumbled Glass
Peacock Feahers
Blueprint Sketch
Chipped Sapphire
Black Soot

Copic Markers:
Mummy's - C00, C1, C3
Skin - E17, E15, E13 / E13, E11, E00
Pumpkin Basket: YR27, YR24, E17, Y38

Gina K Connect Glue
T4TD Blending Brush
Versafine Onyx Black Ink
Big Shot Die Cutting Machine
My Sweet Petunia Mini Stamp Platform
Heavy Weight White Cardstock (300gsm)
Black Cardstock (250gsm)

Wednesday 29 January 2020

Super Cute Wedding Card! Heffy Doodle

Hello Heffy Doodlers!  Its Elaine here today as Guest Designer for Heffy Doodle!  Thank you again to Lesley and Laura for having me this month, its been a wonderful opportunity and I’m so grateful.

To start this card I took a piece of heavy weight cardstock cut to approximately 5.5″ x 4.25″ and I ran this card through my die cutting machine along with the frame die from the Mama Elephant Madison Avenue Creative Cuts set.  I set the frame aside and started work on the inner panel.


Using the ‘Heart Confetti‘ stencil I dry embossed the card panel that sits inside the frame.  I used ‘tab 1’ on my die cutting platform (I used a big shot) then my sandwich/layers was a follows;  base cutting plate, silicone mat, cardstock, stencil, top plate and I ran that through the die cutting machine.  Ideally I would use 2 silicone mats but I only have 1 so I ran everything through the die cutting machine again but added a few cardstock shims on top to give some extra pressure.


Starting in the center I then slowly and very lightly ink blended on some Dusty Concord Distress Ink with a mini foam pad on an ink blending tool.  The ink blending really brings to life the confetti pattern of the heart stencil.  I concentrated the colour in the center and lightened my hand as I got closer to edges to give a really soft and pretty gradient.


To give some extra interest to the panel I smooshed some Dusty Concord Distress Ink on to my glass craft mat and loosed it with a wet paint brush splattered on to some small paint platters.


I also splattered on some pretty gold ink, I love this Windsor & Newton gold ink, it so shimmery!


While my ink panel was drying I moved on to stamping and colouring my images.  I used the Happily Ever Crafter stamp set and coloured them with my copic markers.  I picked colours which I thought worked well with the Dusty Concord panel.  The colours I used were:

Guy suit – C7, C5, C3
Guy hair – E27, E25, E23
Girl dress – BV13, BV08, BV02, BV01, BV00
Girl hair – E49, E47, E44
Skin – E13, E11, E00, R20

I die cut the images with the co-ordinating dies and glued the hat and tiara on to my guy and girl with some liquid adhesive.

For the sentiments I shaded some BV13 on to some white cardstock.  Once fully dry I heat embossed in white the words ‘wishing you a’ and ‘wedding’ and cut them out using my guillotine trimmer.  The word ‘magical’ was cut from some super pretty glittery mauve card from DCWV.  The die cut lost its shape a little so I also cut the word magical from heavy weight white card stock and layered the glittery card on top to give strength and keep the shape.


I used some plain mauve cardstock from my stash and cut it to 5.5″ x 4.25″  I adhered this mauve card panel to a top folding A2 white card base.  I adhered the white frame on top trying to keep the border even around all edges.  I then secured the heart embossed panel back inside the frame.  I wanted my frame to have a little extra dimension so I die cut another frame from some shimmery white card and adhered this over the top of the first frame.

I secured sentiments to the card first to make sure I had enough room for them.  Once I had the sentiments adhered I also secured the bride and groom and their accessories.


As a final embellishment I popped some Liquid Glaze on to the top hat and tiara and a little bit of sparkle to her dress with my Wink of Stella pen.  I added a couple of lilac gems to add a finishing touch of sparkle!

I hope you enjoyed this card and it gives you some inspiration for  your own creations.  Elaine xx

About

Search This Blog