Wednesday, 29 January 2020

Super Cute Wedding Card! Heffy Doodle

Hello Heffy Doodlers!  Its Elaine here today as Guest Designer for Heffy Doodle!  Thank you again to Lesley and Laura for having me this month, its been a wonderful opportunity and I’m so grateful.

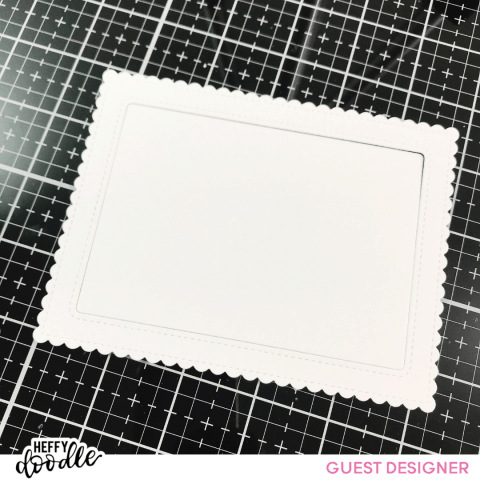
To start this card I took a piece of heavy weight cardstock cut to approximately 5.5″ x 4.25″ and I ran this card through my die cutting machine along with the frame die from the Mama Elephant Madison Avenue Creative Cuts set.  I set the frame aside and started work on the inner panel.

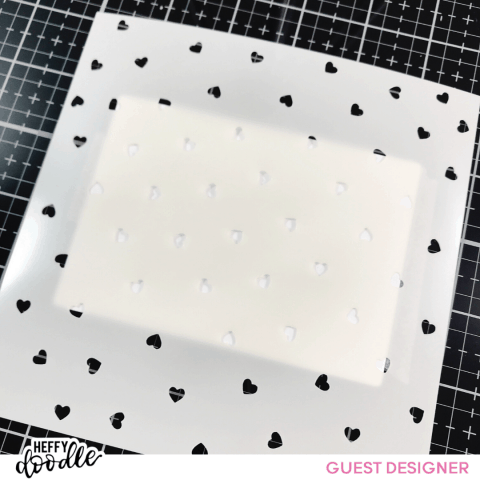
Using the ‘Heart Confetti‘ stencil I dry embossed the card panel that sits inside the frame.  I used ‘tab 1’ on my die cutting platform (I used a big shot) then my sandwich/layers was a follows;  base cutting plate, silicone mat, cardstock, stencil, top plate and I ran that through the die cutting machine.  Ideally I would use 2 silicone mats but I only have 1 so I ran everything through the die cutting machine again but added a few cardstock shims on top to give some extra pressure.

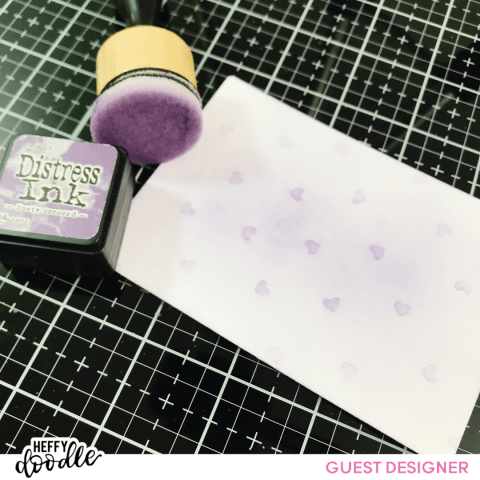
Starting in the center I then slowly and very lightly ink blended on some Dusty Concord Distress Ink with a mini foam pad on an ink blending tool.  The ink blending really brings to life the confetti pattern of the heart stencil.  I concentrated the colour in the center and lightened my hand as I got closer to edges to give a really soft and pretty gradient.

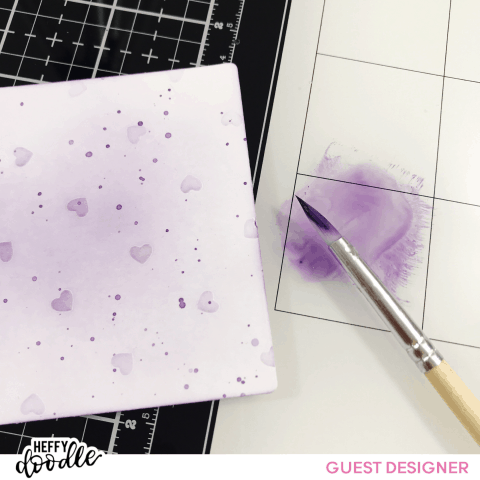
To give some extra interest to the panel I smooshed some Dusty Concord Distress Ink on to my glass craft mat and loosed it with a wet paint brush splattered on to some small paint platters.

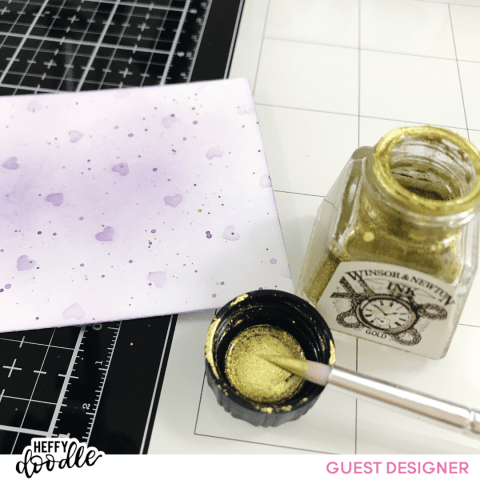
I also splattered on some pretty gold ink, I love this Windsor & Newton gold ink, it so shimmery!

While my ink panel was drying I moved on to stamping and colouring my images.  I used the Happily Ever Crafter stamp set and coloured them with my copic markers.  I picked colours which I thought worked well with the Dusty Concord panel.  The colours I used were:

Guy suit – C7, C5, C3
Guy hair – E27, E25, E23
Girl dress – BV13, BV08, BV02, BV01, BV00
Girl hair – E49, E47, E44
Skin – E13, E11, E00, R20

I die cut the images with the co-ordinating dies and glued the hat and tiara on to my guy and girl with some liquid adhesive.

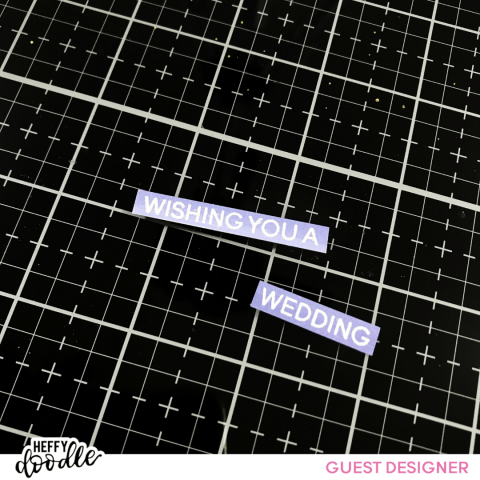
For the sentiments I shaded some BV13 on to some white cardstock.  Once fully dry I heat embossed in white the words ‘wishing you a’ and ‘wedding’ and cut them out using my guillotine trimmer.  The word ‘magical’ was cut from some super pretty glittery mauve card from DCWV.  The die cut lost its shape a little so I also cut the word magical from heavy weight white card stock and layered the glittery card on top to give strength and keep the shape.

I used some plain mauve cardstock from my stash and cut it to 5.5″ x 4.25″  I adhered this mauve card panel to a top folding A2 white card base.  I adhered the white frame on top trying to keep the border even around all edges.  I then secured the heart embossed panel back inside the frame.  I wanted my frame to have a little extra dimension so I die cut another frame from some shimmery white card and adhered this over the top of the first frame.

I secured sentiments to the card first to make sure I had enough room for them.  Once I had the sentiments adhered I also secured the bride and groom and their accessories.
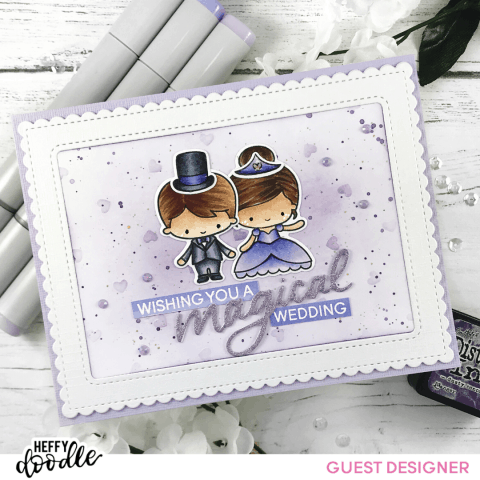

As a final embellishment I popped some Liquid Glaze on to the top hat and tiara and a little bit of sparkle to her dress with my Wink of Stella pen.  I added a couple of lilac gems to add a finishing touch of sparkle!

I hope you enjoyed this card and it gives you some inspiration for  your own creations.  Elaine xx

Wednesday, 15 January 2020

Guest designing for Heffy Doodle!

Hi crafty friends!  It's Elaine here (you may also know me as Pink Peppermint Cards on Instgram & YouTube).  I'm so so excited to be guest designer on the Heffy Doodle blog today!  Thank you to Lesley and Laura for having me, I'm so honoured and grateful for the opportunity.
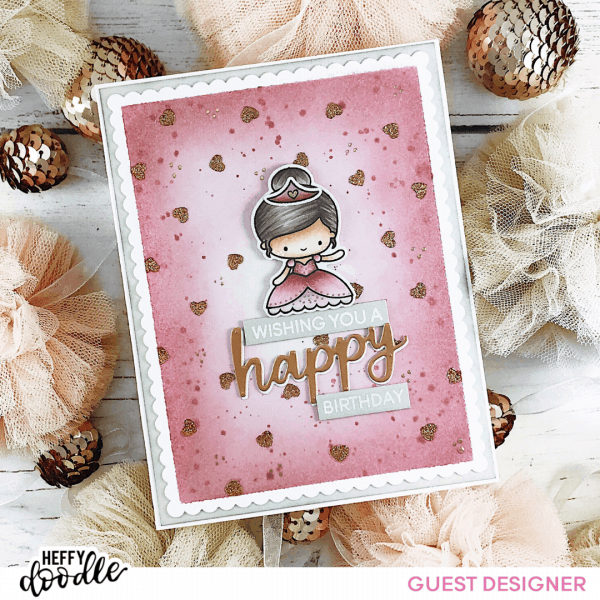
I decided to work with Happily Ever Crafter stamp set because I thought it was so versatile for this time of year...birthday's, Valentine's day, weddings....today I'm making a cute girls birthday card.
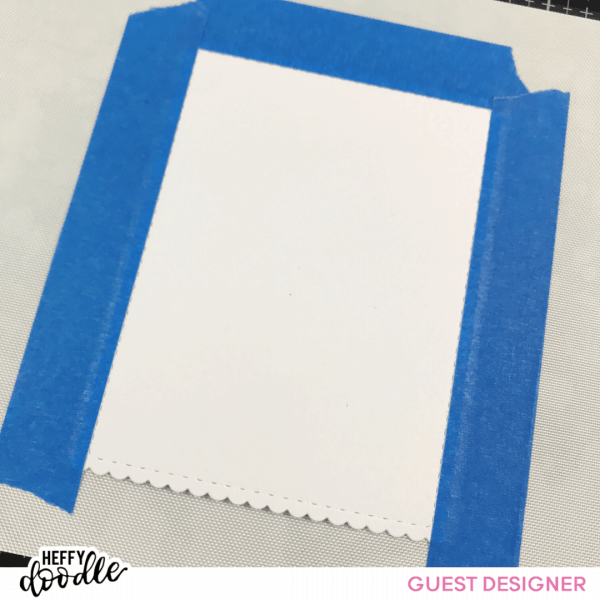
The first step was to take a piece of white card stock and run it through my die cutting machine with a scalloped rectangle die slightly smaller than 4.25"x5.5" as I want a small border around the edges.  I used the scallop rectangle from 'All Prettied Up' by Mama Elephant.  I used some blue painters tape to mask off around the stitched edges on the card stock to give myself a nice border.
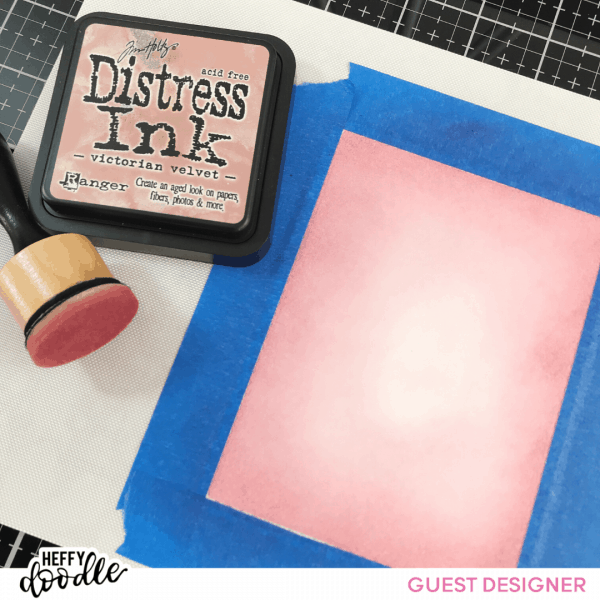
I used one of my favourite Distress Inks, Victorian Velvet to ink blend a soft vignette on to the cardstock....focusing more ink around the edges and getting lighter towards the centre.
Before removing the tape I smooshed some more of the Victorian Velvet Distress Ink on to the craft mat and ran a small wet paint brush through the ink to add some splatters on to the panel.  I let the panel dry for a few minutes.
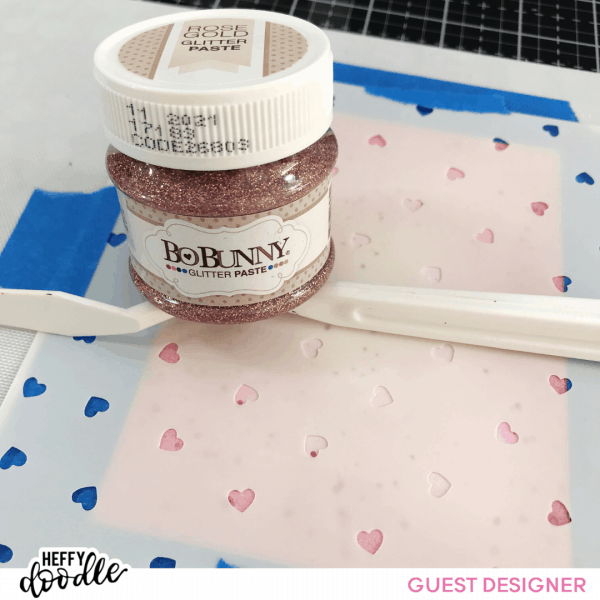
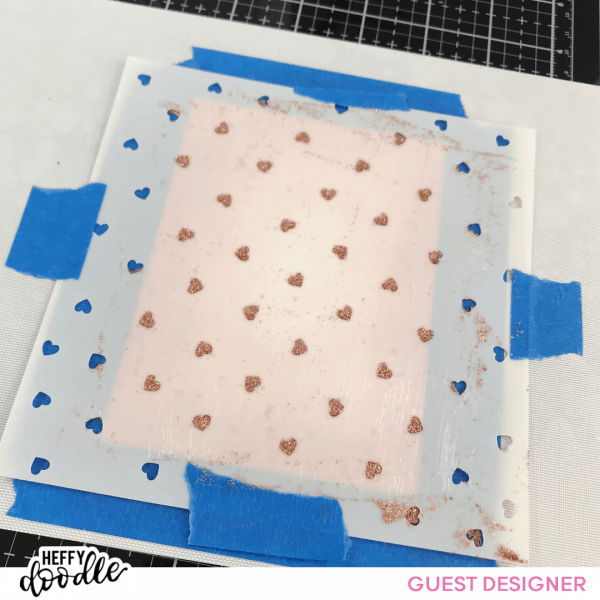
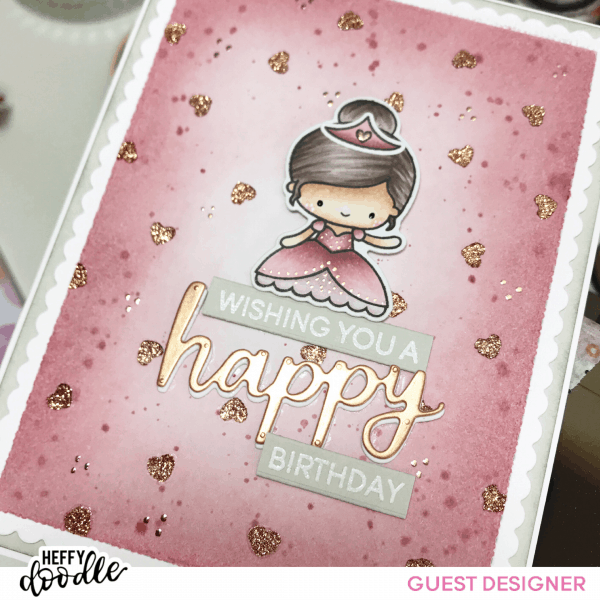
To add some more texture to the card I used the new Confetti Hearts stencil with some beautiful rose gold embossing paste.  I secured the stencil over the ink blended card panel with some blue painters tape and then used a small amount of paste to smooth over the top of the stencil using a pallet knife.  I smoothed the paste through the heart openings in various directions to ensure the full shape of the heart was formed.  I carefully removed the tape and stencil from the card panel and quickly washed my stencil and pallet knife.  I also removed the tape from card panel to expose the white border.
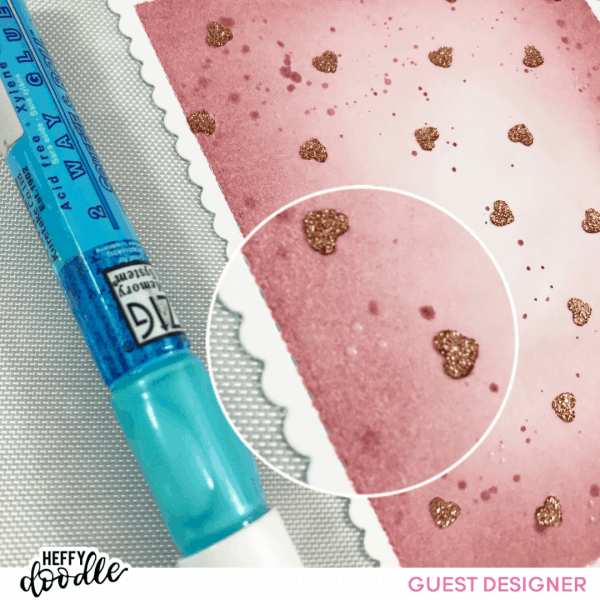
Whilst the embossing paste was still wet, I added some little foil dot detail between the hearts.  I use a small tipped glue pen, I find a Quickie glue pen the best as it has a very fine nib but for today's card I used my Kuratake glue pen.  I added several groupings of three dots all over the card base inbetween the glittery hearts and left the dots to dry/go tacky for 10 minutes.  I have shown this enlarged image below:
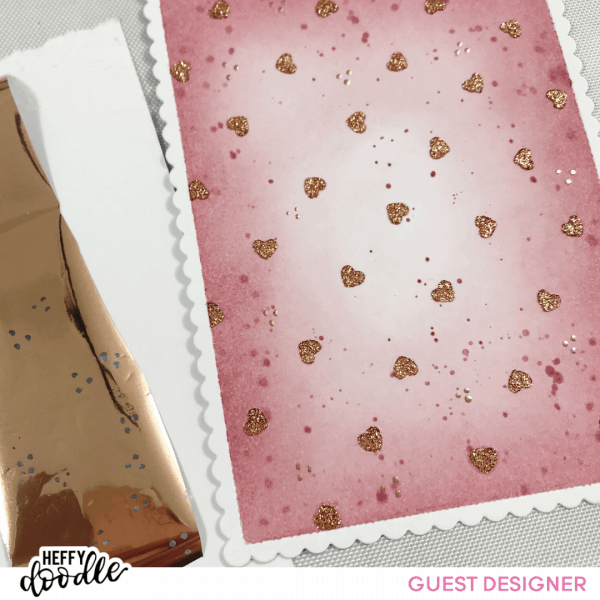
Once 10 minutes or so had passed (you can work on the images at this point!) I laid some rose gold foil over the dots and applied pressure with my fingers.  Click here to see the one I like to use.  The effect is so pretty!
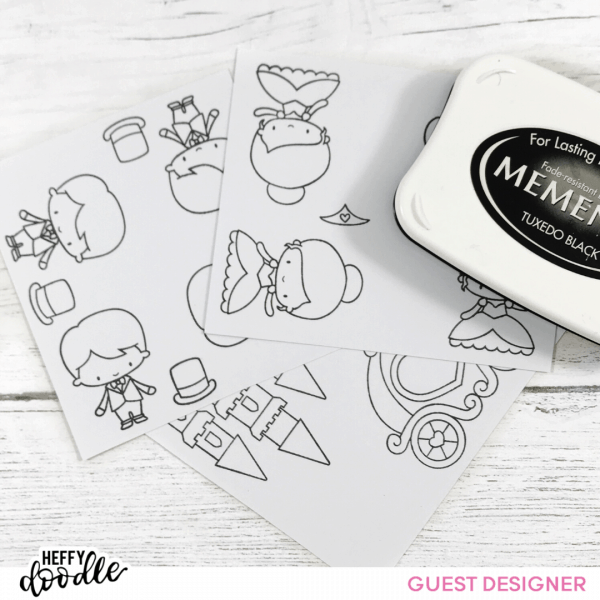
Setting the panel aside for a while, I stamped out a few images from the Happily Ever Crafter stamp set on to some copic friendly card stock with Memento Tuxedo Black Ink.  I like to stamp a few images at a time in case I make mistakes and have extras for more projects.
To pick out the colours for my cute princess image I brought my Sandy Allnock Hex Chart over to my card panel to see what copic markers would look nice and decided to use R56, E04, RV32 for the main part of the dress and RV32 &RV91 for the underskirt.  These are new combinations for me, I can't recommend using a Hex Chart enough!  For her skin I used E13, E11 & E00 and the hair E77, E74 & E71.  I added a few foiled gold dots on to her dress using the same technique as above.
Once I finished colouring in the princess and her tiara/crown I used the Happily Ever Crafter Co-ordinating Dies to cut out my images.
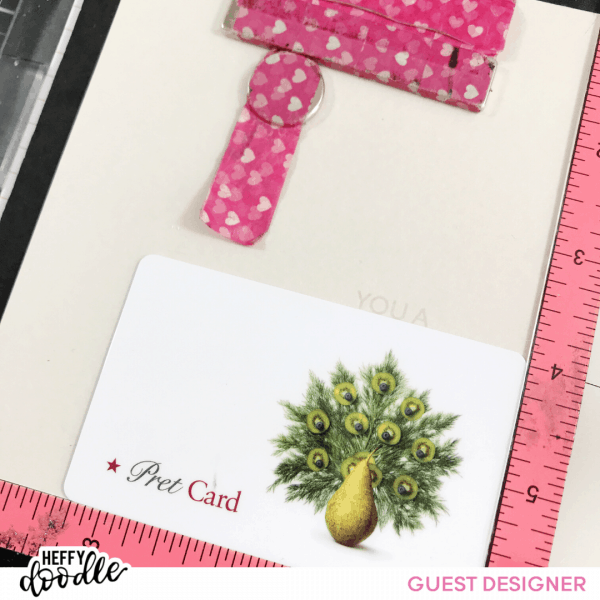
For the sentiment on my card I used the 'wishing', 'you a' and 'birthday' stamps in the set and heat embossed them in white on to some light gray cardstock.  To get the 'wishing' and 'you a' perfectly straight I popped a gift card in to my mini misti and lined the stamps flush with the edge of the gift card....so much straighter than me eyeballing it!   I used Versamark Ink and a Ranger Superfine White Embossing Powder then heat set with a heat tool.  I trimmed the sentiments out with a guillotine trimmer.
For the 'happy' I used Heffy Cuts Happy Die and die cut it from white card stock and also some rose gold pearlescent cardstock and glued them together leaving a little white shadow to make the word pop.
To bring all the elements of the card together I created a side folding A2 sized card base and adhered a light grey piece of card on top leaving 1/16th of an inch border around the edge.  I lightly ran some Iced Spruce Distress Ink around the edge of the light grey card before adhering it to make it pop against the white card base.  Next I adhered the pink ink blended panel centred to leave an even border all the way round.  I applied the some thin double sided tape to the grey sentiment strips and adhered these to the card, for the 'happy' I adhered it to the card with liquid adhesive.  I popped some dimensional foam tape on to the back of my princess and adhered her to the card and applied some liquid glaze to the crown.

This finishes off my card for today!  I hope you liked it and found some inspiration in my design.
Have a wonderful crafty day!
Elaine x

Monday, 6 January 2020

First Valentines Card for 2020!

Hello and a very happy new year to everyone!  I hope you are all feeling rested and refreshed after the festivities!  I love making Halloween and Christmas cards so I'm sad to see that season go but I'm really excited for the next few months of valentines and Easter card projects!

After the holidays I sometimes find it hard to get my creative juices going so I like to look for inspiration in sketch and colour challenges....today's card was inspired by the colours in this week's color throwdown challenge.
I started with a piece of kraft cardstock measuring 4 1/4" x 5 1/2" and masked of 1/4" around the edges with post it tape.  I then took the 'falling hearts' stencil from Simon Says Stamp and spread some 'Ruby' Nuvo gimmer paste over the stencil.  Once I was happy with the coverage I quickly cleaned my stencil and pallett knife....this stuff dries FAST!  I set that piece aside to dry.

To create the frame I die cut some white cardstock with Lawn Fawns 'Outside in Stitched Scalloped Rectangles' (the largest in the set).  I took the scalloped piece and die cut a smaller rectangle to create a frame for the card.
I used the 'Love Quotes' stamp set by Mama Elephant for the main images and sentiments on the card.  I stamped the penguins with Memento Tuxedo Black ink on to copic friendly cardstock and coloured them with copic markers in C7, C5, C3, Y38.  The bow was coloured in R59, R39, R27.
I stamped the 'I love you, I love you' sentiment on to white cardstock which had been treated with antistatic powder bag with Versafine Sepia ink.  Clear embossing powder was applied over the top and heat set with a heat gun.  I die cut the penguins and sentiment with the co-ordinating dies.
To frame my penguins on the card I cut the smallest polaroid frame from the 'polaroid fun' set and backed it with foam tape.  I secured all the elements on to the now dry kraft card panel.  To add some extra details I die cut some hearts from some glittery red card.
I felt the lower third of the card was a little bare so I added a 'you're the best' sentiment from Mama Elephant's 'Occassional Labels' set - again I used the Versafine Sepia ink for this and trimmed it out with my guillotine leaving a small white border around the edge.  I secured this to the card panel with some dimentional foam tape.

I hope you enjoy this card and it gives you some inspiration for your own cards!

Have a great crafty day! xxx

Sunday, 15 December 2019

Pretty Pink Posh Hoiday Signs - Last card for 2020!

Yay! It's nearly Christmas!!  Boo, that means no more Christmas projects for a while.... :( I absolutely love making Christmas cards so I'm super excited to bring one last card to my blog and YouTube video today.  

For this card I used the Pretty Pink Posh 'Holiday Signs' stamp set which sooo cute!

I created a watercolour background using some watercolour cardstock and a nice navy coloured paint.  Once the background was dry I added a few snowflakes  using a sparkly white embossing powder.  I also splattered on a few white 'snowflakes' with some watered-down white gouache....you can never have enough snowflakes!!  I trimmed my card panel down to 4"x5.25" and adhered this a piece of navy cardstock measuring 4.25"x5.5" which leaves a nice 1/8" border all the way around and ties in really nice with the navy watercolour.

I stamped my images on to copic friendly cardstock with memento tuxudeo black ink and coloured the images using a variety of copic markers (colours used are listed below) and cut them out using my pixscan mat and silhouette portrait.  I popped the coloured images in to my misi tool and added all the sentiments using the same memento black ink.

To add dimension to the card I used foam tape behind my images and then secured them to the card with the help of a T-square ruler.

I adhered the whole card panel to a landscape top folding cardbase and finished off the card by adding a bit of nuvo crystal glaze on to a few elements of my characters.
I had some images left over so added them to some tags and added some pretty red glittery ribbon and voila.... some super easy and super cute Christmas tags!
I hope you like these super fun and festive designs...here's a list of all the products used:

- Holiday Signs - Pretty Pink Posh
- Watercolour cardstock - Rowney Daler
- Gansai Tambi 36 Colour Palette - No.67
- Silver Black Velvet Round Brush No.8
- Snowflakes: Cheerful Christmas - Simon Says Stamp, Christmas Deer - Time for Tea Designs
- White Twinkle Puff embossing powder - WOW!
- Superfine White Embossing Powder - Ranger
- Heat Gun
- Guillotine
- White Gouache - Winsor & Newton
- Copic Markers:
Signs
E27, E25, E23 , E21
Santa 
Hat/gloves/coat: R59, R39, R27
Hat trim: C3, C1, C00
Boots: C10, C7, C5
Reindeer
Face/ears/body: E55, E53, E51, E50, E37, E33, E31
Antlers/Hooves: E29, E25
Ears/cheeks: R22, R20
Snowman
Hat: C9, C7, C5, G99, G94
Body: G00, G000, G0000
Nose: Y09, Y04, Y02
Cheeks: R20
- Sizzix Bigshot Die Cutting Machine - https://bit.ly/2MKlLBp
~~~~~~~~~~//~~~~~~~~~
I wish you all a very merry Christmas and a happy new year!

xxx


Thursday, 5 December 2019

Hello Bluebird 'First Snow' Winter Scene Card

Hello crafty friends!

Finally I'm back with a new video and blog post!  It's been quite a crazy few months with house renovations and sadly some illness (nothing serious thankfully) so I've needed to be in full Mummy mode looking after everyone!  Crafting has had to take a bit of a backseat...such a shame when Christmas cards are my favourite to make.

Today I'm excited to share this adorable card using the Hello Bluebird 'First Snow' stamp set along with some of my favourite Mama Elephant dies.  There's also lots of shimmer and shine with sparkles and glitter along the way.  

I used a colour pallet for inspiration for this card.  Sometimes I just don't know what I want to create....even though I know I want to make SOMETHING...so colour pallets help me as a jumping off point and I go from there.  This is the image I found to help me create this card:
If you would like to see my Pinterest board with all the colour pallets I have saved then just click here!  This particular image has been take from here.


 To see the video I created showing how I made this card then just click below:

Here is a list of the supplies used in the making of this card:

~ First Snow Clear Stamps - Hello Bluebird - https://bit.ly/2ORrVCZ
~ First Snow Dies - Hello Bluebird -https://bit.ly/34Ubk76
~ Landscape Trio Creative Cuts - Mama Elephant - https://bit.ly/2Ln38EM
~ Home Collection Creative Cuts - Mama Elephant - https://bit.ly/33MokKM
~ Cloud 9 Creative Cuts - Mama Elephant - https://bit.ly/361NfeB
~ Strathmore Bristol Smooth Cardstock - https://bit.ly/2qjV9Rq
~ Distress Ink (Tattered Rose) - https://bit.ly/2ONamUC 
~ Distress Ink (Victorian Velvet) - https://bit.ly/2Rm1eIq
~ Distress Ink (Aged Mahogany) - https://bit.ly/2LnJ9G6
~ Distress Ink (Iced Spruce) - https://bit.ly/2YgeSOw
~ Delicata Ink (Rose Gold) - https://bit.ly/2Pcg0i6
~ Ranger Archival Ink - Potting Soil -https://bit.ly/2Lk7Xyw
~ Glitter Cardstock (houses & trees) - https://bit.ly/2LoBDur
~ White Premium Cardstock 300gsm - https://bit.ly/2DKsiZR
~ Signo White Gel Pen - https://bit.ly/2RkaEnz 
~ Silver Black Velvet Brush Size 4 Round - https://bit.ly/34RTS30 
~ Liquid Stardust - Lawn Fawn - https://bit.ly/34QR4Ds
~ Mini Mister - https://bit.ly/2Lpol0H 
~ Copic opaque white - https://bit.ly/2YjJWg9
~ Clay Snowflakes - Lucy’s Cards - https://bit.ly/2YekfxM
~ Gold Stars - Lucy’s Cards - https://bit.ly/2RjSwKz
~ Gina K Connect Glue - https://bit.ly/2DXMW8Z
~ Zig Clean Color Real Brush Markers - https://bit.ly/2qqwYkw
Bunny: Mid Brown (065), Blender (999)
Penguin:Green Gray (093), Pale Gray (097), Oatmeal (064), Light Brown (061)
Reindeer: Dark Brown (062), Light Beige (074), Mid Green (046)
~ Sizzix Bigshot Die Cutting Machine - https://bit.ly/2MKlLBp

Thanks for stopping by my blog and I hope it gave you some inspiration!  Leave me comment if you have any questions xx

Monday, 16 September 2019

Mama Elephant 7th Anniversay Stampede


Welcome to a very special Mama Elephant Design Team blog hop! We are celebrating 7 years this month with a fantastic new holiday release along with our amazing friends!

Hello and welcome!  I'm so honoured to be part of this stampede and I can't wait to share my projects with you.  Once I've shown you the cuteness and fuzzies from this epic release be sure to carry on reading to hear about the amazing freebies on offer for the release and also a GIVEAWAY!!  Let's jump in to my projects!


For both of these cards I started by taking a piece of cardstock measuring 5.75"x4.5" and began blending ink top to bottom in portrait layout.  I wanted the top to be darker then gradually fade away into white.  I used Picked Raspberry distress ink for the pink themed card and a navy dye ink on the blue card.  I created the look of falling snow by diluting some copic opaque white with water and flicking it on to the card panels with a small paint brush.


I cut the beautiful tree scene from heavy weight smooth white cardstock using the Winter Forest Cover CC I then used post it note tape to mask off around the stitched border and then began blending on ink to snow bank/ground.  The bunny card I used Iced Spruce distress ink and for the bears Evergreen Bough distress ink.  On the trees I lightly blended on some ink (a very light layer of Picked Raspberry on the pink cards and some Evergreen Bough distress ink on the blue card). For the snow drift sitting behind the trees on the blue card I used a die from the Landscape Trio CC to cut another snow drift. I ink blended this with the same navy ink fading in to Evergreen Bough distress ink.

To add sparkle I dotted on glue with a glue pen all over the tress and along the base of the trees then sprinkled on white glitter...I love the subtle sparkle it gives the snow banks and trees!
The adorable bears and bunnies are from the Fuzzy Hugs stamp set which I coloured with copic markers.  Here are the markers I used:
Bunnies: E55, E53, E51
Dress/Boots: RV69, RV66, RV63
Scarf: YG67, YG63, YG61
Trousers: B26, B24, B21
Jumper: C5, C3, C1
Boots: W8, W6, W4
Large Bear: E39, E37, E35, E34, E33
Small Bear: E25, E23, E21
Jumper/Hat: RV69, RV66, RV63, BG49, BG15, BG13, BG11
I love the cuties in this set SO much!  I can't wait to colour them in different colours and with different mediums!

I cut the bears and bunnies out with the co-ordinating dies and set them aside for later.  I used sentiments from the same stamp set on both cards.  The pink card I stamped directly on to the card panel with Versafine onyx black ink.  For the blue card I white heat embossed the sentiment on to black cardstock and trimmed it down with my mini guillotine.  I adhered it on to the trees with some liquid adhesive.

To make all the elements come together as a card I took at A2 side folding card panel and secured the ink blended panel first with liquid glue (I previously went ahead and trimmed the panels down to 5.5"x4.25").  For the blue card with the bears I next adhered the snow bank.  The tree panel was adhered next, again using liquid adhesive.  I was careful when pressing down to secure this layer so as not to disturb the glitter too much!  Last step was to adhere my coloured images and add some nuvo aqua shimmer pen on to the bears and bunnies - never enough sparkles!  I also added a dot of Nuvo Glaze to the bears and bunnies noses.  For the pink card I added a few snowflake sequins and teeny tiny pink rhinestones...you can jazz things up any way you choose!

I've created a YouTube video if you would like to check that out after you've followed along the stampede


I hope you enjoyed these cards and they give you some inspiration!  This anniversary release is truly amazing!  Be sure to check out the fantastic giveaway and freebie information below PLUS you'll also find links to the stampede blogs...next in the stampede is the amazing Laura Bassen!
**************
Here is the promotional flyer for this year's celebration. We've added an extra freebie tier this time around!


You can shop the newest release which is LIVE in our store now!

www.mamaelephant.com


That's not all! To celebrate this special Anniversary release, Mama Elephant is giving away ten $25 gift certificates to our store!!! That is 10 winners!!! Winners will be chosen at random from the collective blogs in the 3 day Stampede. You have up to 4 chances to qualify to win!

» 1. Leave a comment on this blog post «
» 2. Like/share us on Facebook: facebook.com/mamaelephant «
» 3. Follow/tweet us on Twitter: twitter.com/heymamaelephant «
» 4. Follow/leave a comment for us on Instagram: instagram.com/mamaelephant «
(Each action qualifies for one entry, max 4 entries per stampeder please!)


Here are the designers for today. Please make sure to visit each of them and leave some kind words and comments!


Amy Yang » www.sharingnewlove.blogspot.com
Mette Witus » www.mettewitus.home.blog
Elaine Wakeling » www.pinkpeppermintcards.blogspot.com
Laura Bassen » www.laurafadora.com
Francine Vuillème » www.1001cartes.ch
Laura Volpes » www.abitofmycrafts.blogspot.com
Krstina Werner » www.kwernerdesign.com/blog
Mama Elephant » www.mamaelephantblog.com

Thank you and Happy Stampeding!

Thursday, 13 June 2019

Little Mermaiden Agenda Shaker Card - All Mama Elephant!

Good morning Crafters!  Today I'm back on my blog and YouTube channel bringing you some bright and summery vibes with some cute mermaidens thrown in for good measure!  Thank you to Karen of Karen_Kards who suggested I make something summery or with mermaids (I asked in my YouTube community page what you'd like to see!)  I decided to use both as inspiration!

I'm entering this card in to Mama Elephants Top Card Contest so I used all ME stamps and dies to create this card - check out all the supplies in my list below (they are also all listed in the description box of my co-ordinating video on YouTube).

A full process video is available on YouTube - there were lots of steps to this card and a little difficult to explain with just words....a visual always helps so I hope you check out the video if you want to make something similar!  

I used my Faber Castell Polychromo pencils to colour in the mermaidens....I swatched out some colours to try and match them as closely as possible to the distress inks I used.  Here is a list of colours and the co-ordinating ink colour:

Peacock Feathers - Cobalt Turquoise (155)
Blueprint Sketch - Helioblue-Reddish (151)
Wilted Violet - Manganese Violet (160)
Picked Raspberry - Middle Purple Pink (125)

All other colours:
Burnt Ochre (187) - skin
Dark Flesh (130) - cheeks
Cadmium Orange (155) - fish
Copper (252) - star & fork
When I use my coloured pencils I like to use a blending fluid - the one I use is by Winsor Newton and called Sansodor (I have linked where I buy it from below (UK) but its available widley here in the UK...I'm sure gamsol is similar and I've even heard baby oil works - not tried that myself though!!

When using the blending fluid I like to pop a small make up sponge (really, nothing expensive just a small cheap sponge to hold some fluid is all you need) in to a container - I use a small jar (a clean mini jam jar to be exact) and then pour a little of the blending fluid on to the sponge.  Using a container with a lid is great as it stops the fluid drying out!!
For these small mermaiden images I found it easiest to colour a very light layer of colour on to the image then blend it all out with a stump pencil with blending fluid on.  I then went in with the colouring pencil again to add in shadows and hair streaks.  I then blended the colour out again but not too much, I wanted to keep some definition so its just about blending out harsh lines!  I recommend a sharp point on the pencils especially for creating the hair streaks - you want to keep some nice definition on those streaks of colour!  These images are super tiny so keep pencils sharp to help you stay inside the lines :)

When using a stump pencil you need to make sure you are cleaning off the colour when moving from one colour to the next.....plus you also need to keep the stump pencil to a fine point if possible to help keep in the lines.  One of my lovely subscribers gave me a great tip recently and that was to use a nail file/emery board to file down stump pencils.....what a genius idea!!  Thank you xx

that's it for today folks!  I hope this post inspires you and you enjoyed it...be sure to check out the video here!

Thanks my lovlies...have a great day!! xxx

Here is a list of the supplies I used to make this card!  Some links are affiliate links but most are just there to make things easier for you to find!  If you do use an affililate link I receive a small commission at no extra cost you (yay) but it does help me to keep my crafty passion going and keep bringing you guys inspiration!
*****************************
SSS - Simon Says Stamp (US)
DST - Dies To Die For (UK)
SVN - Seven Hills Crafts (UK)
CST - Craftstash (UK)
AMZ - Amazon (UK)
CTA - Crafty Arts (UK)

• Mama Elephant LITTLE MERMAIDEN AGENDA

• Mama Elephant PARK AVENUE CREATIVE CUTS

• Mama Elephant PICNIC WITH FRIENDS

• Mama Elephant OCEAN WAVES TRIO

• Tim Holtz Distress Ink Pad PEACOCK FEATHERS

• Tim Holtz Distress Ink Pad EVERGREEN BOUGH
http://tiny.cc/roth7y [ SSS ]
http://tiny.cc/brth7y [ CST ]

• Tim Holtz Distress Oxide Pad BLUEPRINT SKETCH
https://shorturl.at/muJNZ [ SSS ]
https://shorturl.at/amnA9 [ CST ]

• Tim Holtz Distress Ink Pad PICKED RASPBERRY
http://tiny.cc/nxth7y [ SSS ]
http://tiny.cc/fzth7y [ CST ]

• Tim Holtz Distress Ink Pad WILTED VIOLET
https://shorturl.at/nCOU5 [ SSS ]
https://shorturl.at/fiqHO [ CST ]

• Cosmic Shimmer PIXIE POWDER White Pearl
https://shorturl.at/clvzT [ CST ]

• Ranger MINI MISTER SPRAY BOTTLE
https://shorturl.at/hqzKW [SSS ]

• Tsukineko VersaFine ONYX BLACK Ink Pad VF
http://tiny.cc/k4th7y [ SSS ]
http://tiny.cc/k4th7y [ CST ]

• Ranger ANTISTATIC POWDER TOOL
https://shorturl.at/oDU34 [ SSS ]

• 3M SCOTCH FOAM TAPE
https://shorturl.at/ctuvX [ SSS ]

• HEAT RESISTANT ACETATE SHEETS
https://shorturl.at/fiCFJ [ SSS ]
https://shorturl.at/hpvF9 [CST ]

• Nuvo/Tonic PURE SHEEN CONFETTI Ice White Circles (Golden Years)
https://shorturl.at/vBJPY [ SSS ]
https://shorturl.at/sxYZ2 [ CST ]

• Winsor Newton SANSODOR Blending Fluid
https://shorturl.at/hyzE2 [ CTA ]

• Tim Holtz Tonic GLASS MEDIA MAT
http://tiny.cc/96th7y [ SSS ]
http://tiny.cc/z9th7y [ CST ]

• Sizzix Big Shot Machine Only White & Grey UK
http://tiny.cc/lbuh7y [ CST ]

• Sakura STARDUST GLITTER PEN Silver
https://shorturl.at/iwDEO [ SSS ]
https://shorturl.at/gkGK3 [ CTP ]

• Gel Pen WHITE uniball
https://shorturl.at/fjkwG [ SSS ]

• Nuvo by Tonic AQUA SHIMMER PEN
https://shorturl.at/hqQY6 [ SSS ]
https://shorturl.at/vyMNR [CST ]

• FABER CASTELL POLYCHROMO PENCILS
151 Helioblue
160 Manganese Violet
125 Middle Purple Pink
155 Cobalt
130 Dark Flesh (cheeks)
187 Burnt Ochre (skin)
155 Cadmium Orange (fish)
252 Copper (fork/star)
https://shorturl.at/uT348 [ CST ]
https://shorturl.at/jnENQ [ SSS ]

• Spellbinder TOOL N’ ONE
https://shorturl.at/eESY1 [ SSS ]
https://shorturl.at/rBCKL [CST ]

• Tonic 12” GUILLOTINE
https://shorturl.at/iBHJO [ SSS ]
https://shorturl.at/aDIQ3 [CST ]

About

Search This Blog