Showing posts with label copic coloring. Show all posts

Friday, 17 June 2022

Pretty Pink Posh June 2022 Release - Adorable Dino's!

 Hey friends!  Today I'm delighted to be joining Pretty Pink Posh on the June 2022 blog hop!  There are so many cute new sets and I just couldn't wait to use those cute Dino sets!!


Be sure to stay tuned to the end of the post as there are 3 $50 gift certificates to be won!  You'll also find a full list of blog participants.

For my project I have used Dinosaur Friends and Dinosaur Additions stamp set and co-ordinating dies.  I started by stamping my images on to copic friendly cardstock with a black dye ink.  I used some nice rich earthy tones to color my images...here are the colors I used in case you want to use the same:

T-Rex - YG67, YG63, YG61, E08, YR07

Brachiosaurus - E47, E44, E43, E42, YR24, YR23

Diplodocus - E44, Y26, Y23

Palm trees - G99, G94, E27, E25, E23

Grass, E43, E43, YG63, YG61

Bones - W3, W1, W0
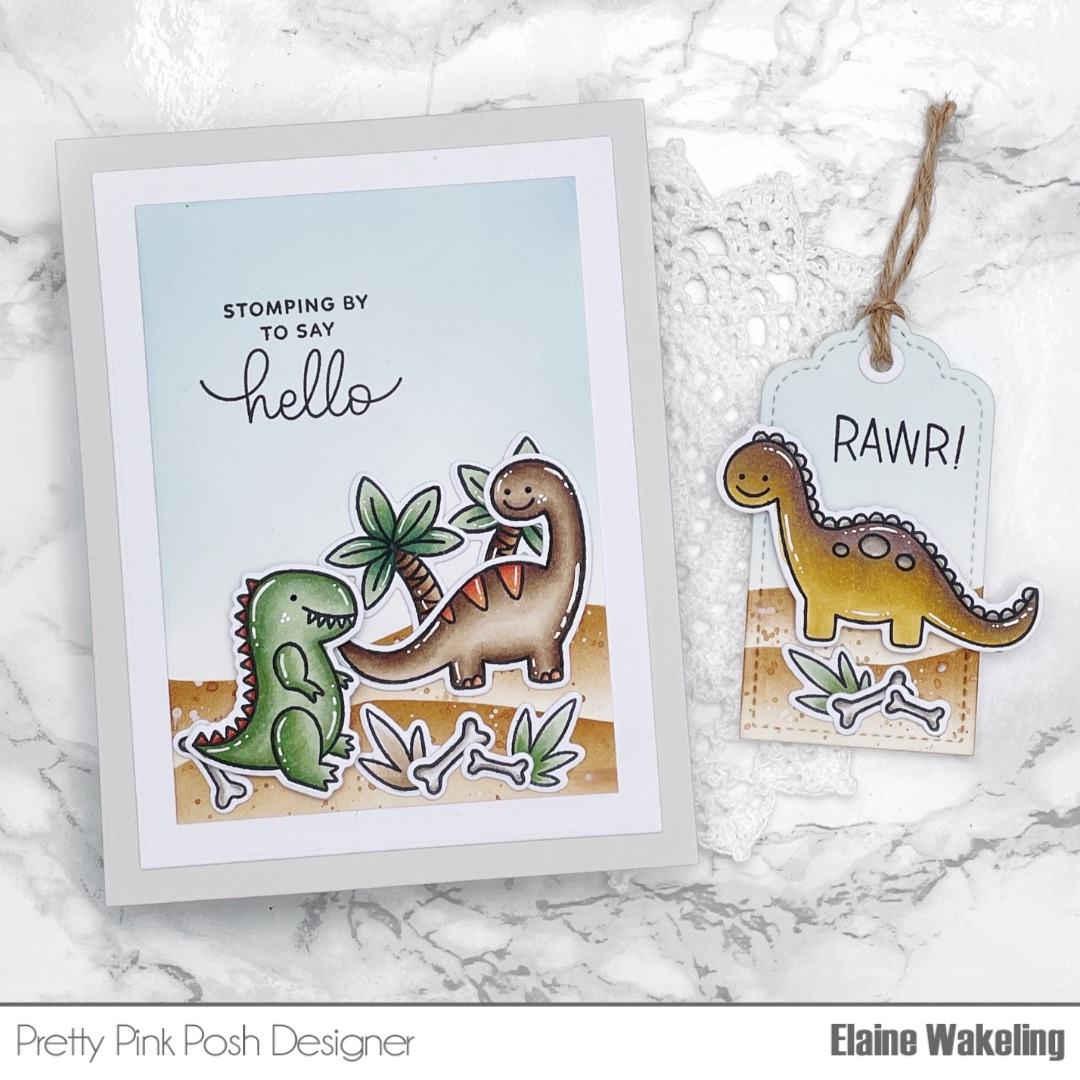
Once all the images were colored I used the co ordinating dies to cut out all the images.  I set them aside while I worked on the card scene.

I cut a piece of Bristol smooth cardstock to 4.5" x 3.25".  I created some wavy shaped masks from sheets of masking paper and used these to create some desert style hills.  I used Distress Ink in Vintage Photo, concentrating the color towards the tops of the hills.  For some added interest and texture, I loosened some of the Vintage Photo with some water and used a small paint brush to flick on some splatters.  For the sky I used Distress Ink in Tumbled Glass, making sure to blend from the top down to give a gradient effect.

Using a combination of liquid adhesive and foam tape I secured the images to the scene.  The sentiment was stamped using a black pigment ink.

I really like the look of layers so I secured the scene panel to a white panel measuring 5 1/8" x 3 7/8" and secured the whole thing to a light grey A2 sized card base.  

I created a matching tag using a tag die from Stitched Essentials 1 Dies.  I used the same masking techniques and ink colors, I love giving cards with a matching tag!  

I hope you enjoyed my project today....now for the chance to win a prize!  Be sure to leave a comment on each blog on the hop (participants below) - winners will be picked randomly and all comments must be left by 11.59pm PST on 6/23/22.  Winners will be announced on the PPP blog.

Hop participants


I hope you enjoy all the inspiration on the hop and love all the new products in this release!  Happy hopping (and shopping!! 😜) 
Crafty hugs, Elaine xxxx

Tuesday, 10 August 2021

Pretty Pink Posh August 2021 Release Blog Hop

Pretty Pink Posh August 2021 Release Blog Hop

DAY 1

Hello and welcome to my blog, crafty friends!  I'm so so excited to be part of this blog hop to celebrate the spooky cute Pretty Pink Posh August 2021 release!


Hopefully you've come from Leica's blog and seen some amazing inspiration so far but don't worry, I've listed all the blog hop participants at the end of this post in case you've missed any or started here.  ALSO, be sure to check out the GIVEAWAY at the end of this post! Now on to my project for the hop!  

For my card I started by stamping the Halloween Circles on to copic friendly cardstock with a copic friendly black ink.  I coloured all the images with copic markers and used the following combinations:

Spider: W8, W6, W4
Cat & Hat: C10, C7, C5, RV66, RV63, E25, E23, E21
Ghosts: B02, B01, B000
Pumpkins: E18, YR27, YR24, W8, W6, W4, YG99, YG97
I really wanted to create an ink blended look in the background of the circles so I stamped all of the circles again on to masking paper and cut them out.  I also cut out masks for the circles.

Once all the images were masked I used a medium sized ink blending brush to apply Lilac Poses Tuxedo Dye Ink on each of the circles focusing the majority of the colour in the centre and fading out.  To add interest to the background I added some splatters using the same Lilac Poses Ink along with some black paint splatters.  The best part is removing the masks, so satisfying!

For my card base I used the same Lilac Poses Ink and blended all over a piece of white card measuring 3 3/8" x 8.5".  While I had the ink out I also created a tag with the same background.  The tag die is from the Spring Circles co-ordinating die. I added splatters of Lilac Poses ink, black paint and white gauche.  From black card I cut a scallop frame from the Slimline Scallop Frames die set and the zigzag circles from the Halloween Circles die set.  
I die cut out my stamped circles using the round circle die in the Halloween Circles co-ordinating die set and secured them with foam tape to the black circle bases.  Next, I secured the black scallop frame to the card base with liquid adhesive.  I used liquid adhesive to secure all three circles to the card front trying my best to space them out evenly.

For the sentiments I used a stamp from the BOO stamp set and white heat embossed it twice on to black card stock.  I trimmed the sentiments down to thin strips and secured the sentiments to the card and tag with foam tape.
My card panel was secured with liquid adhesive to a slimline card base.  To finish off the tag I used my crop-a-dile to punch a hole, add an eyelet and thread on some ribbon.

So that wraps us the post for my card, thank you so much for joining me and I really hope this project inspires you for your own creations.  Next on the hop is Channin Pelletier but just in case you need the full list of blog hop participants you can find them all here:


Finally, don't forget to leave a comment each day for a chance to win a $25 gift certificate to the Pretty Pink Posh shop!  3 lucky commenters (one each day) will be picked at random to receive a gift card.  Good luck everyone!! Happy hopping and don't forget to visit the Pretty Pink Posh blog again tomorrow for Day 2! xxx


About

Search This Blog